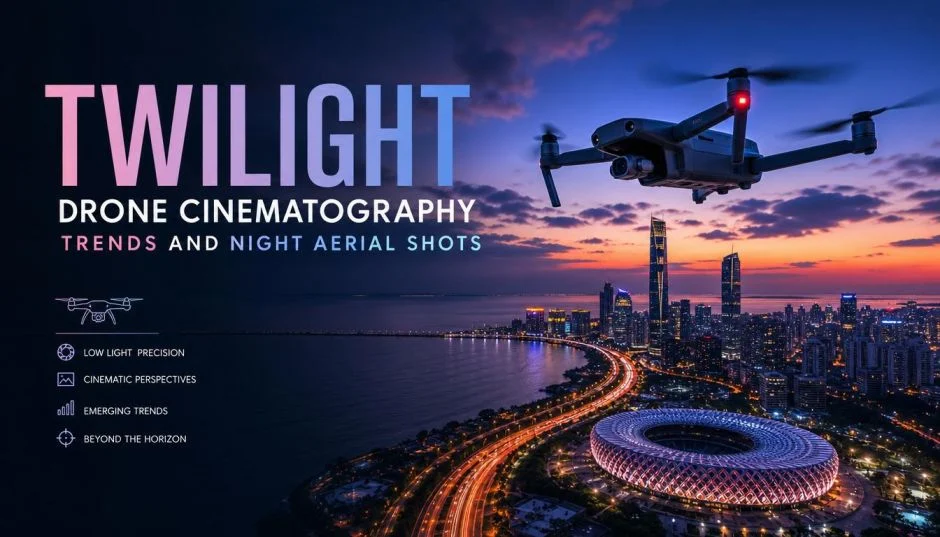
Twilight Drone Cinematography Trends And Night Aerial Shots
You want to master Twilight Drone Cinematography because golden hour is overrated. The real magic happens when the sun drops below the horizon and city lights flicker on. I have logged over 200 night flights across three continents.
Some shots worked. Some crashed into trees. This guide gives you the Twilight Drone Cinematography settings that work right now.
We cover cinematic FPV twilight footage trends in 2026, latest cinematic drone filming trends from the Olympics, and professional low-light drone camera settings that keep your footage clean, not noisy.
Why Twilight Flying Is Exploding Right Now?
Two things changed in 2026.
First, sensor technology jumped forward. DJI’s Osmo Action 6 dropped a variable aperture lens (f/2-4) and a 1/1.1-inch square sensor. That is massive for low light. The first action camera to control depth-of-field. Night shots finally look like cinema, not security footage.
Read Also: How to Start a Tourist Drone Photography Business in Texas?
Second, the Olympics went all-in on twilight FPV. Milano Cortina 2026 deployed 25 drones. 15 were custom FPV units. These tiny cinewhoops weigh just 243 grams but hit 140 km/h. They flew inside luge tracks. They followed skiers at dusk. The broadcast looked electric.
The message is clear. Twilight is not a compromise anymore. It is the prime time.
The Honest Reality: Twilight Flying Is Harder
Let me be direct. You will crash more at twilight than at noon.
The pros:
-
Golden-to-blue transition looks expensive
-
City lights create natural leading lines
-
Less air traffic (general aviation pilots hate dusk too)
-
The "magic hour" lasts longer than sunrise
The cons:
-
Obstacles disappear against dark backgrounds
-
Battery life drops 15-20% in cold evening air
-
GPS lock takes longer as satellites shift
-
You cannot see your drone orientation past 100 meters
My honest take after losing one drone to a twilight tree branch: Fly higher than you think you need. Altitude is safety at night. A crash from 50 meters hurts the same as a crash from 10 meters, but you avoid more obstacles up high.
Professional Low-Light Drone Camera Settings That Actually Work
Stop guessing. Here is the exact setup for professional low-light drone camera settings.
The Golden Formula for Twilight Video
| Setting | Value | Why |
|---|---|---|
| ISO | 400-800 | Keep it under 800. Above that, noise eats your footage. DJI Mavic 3 stays clean at 800. Mini series gets grainy at 400. |
| Shutter Speed | 1/50s (for 24fps) | The 180-degree rule. 1/50 gives natural motion blur. Faster shutter looks jerky. Slower shutter blurs too much. |
| Aperture | f/2.8 or widest | Open it all the way. You need every photon. Fixed aperture drones (Mini series) cannot adjust this. |
| White Balance | Manual 4500K-5500K | Auto WB shifts mid-shot. Lock it. 4500K for city lights. 5500K for warm sunsets. |
| Format | RAW video (if supported) or 10-bit D-Log | Gives you room to fix exposure in post. Standard 8-bit falls apart when you lift shadows. |
The Twilight Photo Settings
| Setting | Value |
|---|---|
| ISO | 100-400 (lower is always better) |
| Shutter | 2-8 seconds for light trails; 1/15s+ for sharp cityscapes |
| Aperture | f/2.8-f/4 |
| Bracketing | 3 or 5 exposures (AE bracket) |
For light trails, you need a perfectly still hover. Wind over 10 km/h will blur everything. Shoot in GPS mode, not manual .
The One Setting Everyone Forgets
Turn OFF WDR (Wide Dynamic Range) for night flying.
Here is why. WDR brightens shadows. But at night, everything is shadows. WDR processing makes the image look worse. It adds artifacts. It kills contrast. Turn it off. Trust me on this.
ND Filters: Do You Need Them at Twilight?
Yes. But different strengths than daytime.
You Must Also Like: Is It Drone Mapping Software for Construction Tech?
At sunset, the sky can still be bright while the ground is dark. Your drone wants to overexpose the sky. An ND filter reduces light, allowing you to keep ISO 100 and 1/50s shutter.
ND strengths for twilight:
| Condition | ND Filter |
|---|---|
| Early golden hour (sun still above horizon) | ND8-ND16 |
| Peak golden hour | ND16-ND32 |
| Blue hour (sun below horizon) | No ND or ND4 |
| Direct sun in frame | ND32-ND64 |
Most DJI ND kits include ND4, ND8, ND16, ND32, ND64. For twilight, ND8 or ND16 covers 80% of conditions.
Pro tip: A Circular Polarizer (CPL) works wonders over water at sunset. It kills glare. It deepens the sky. But it costs 1.5-2 stops of light. Factor that into your ND math.
Cinematic FPV Twilight Footage Trends in 2026
The cinematic FPV twilight footage trends in 2026 are wild. Here is what the pros are doing.
Trend 1: The "Inside the Track" Shot
The Milano Cortina Olympics proved FPV can fly inside confined spaces at speed. Custom cinewhoops with inverted propellers (called "pushers") tracked lugers down ice tracks. The camera was 2 feet behind the athlete .
How to adapt this: Find a winding path, bike trail, or urban alley. Fly slow (20-30 km/h) at twilight with LED lights on your drone. The contrast between dark walls and your lights creates the same energy.
Trend 2: Starburst Mode
DJI's Osmo Action 6 introduced "Starburst Mode." It turns bright city lights into dramatic star patterns. No post-processing required .
How to adapt this: Shoot directly into city skylines. Use a small aperture (f/8-f/11) if your drone has variable aperture. Point light sources turn into spikes automatically.
Trend 3: Africa Unseen Scale
The SkyPixel 2026 winner, "Africa Unseen," used 35TB of 8K footage. Multiple drones. FPV integrated with cinematic rigs . The winning formula? Wide establishing shots from a Mavic 3 Pro. Then FPV sequences that put viewers next to wildlife, not above it.
How to adapt this: Plan a 3-shot sequence. Shot 1: High-altitude twilight wide (Mavic, 100m). Shot 2: Medium orbit around a lit building (Air series, 50m). Shot 3: FPV fly-through of a lit structure (Avata, 2m off the ground). Cut them together. You look like a pro.
Latest Cinematic Drone Filming Trends (Not Just Twilight)
The latest cinematic drone filming trends go beyond time of day.
Day-to-Night Transition Shots
This is the most save-worthy trend on social media right now.
The technique: Fly the exact same Waypoint mission twice. Once at noon. Once at twilight. Align the clips in your editing software. Cross-dissolve between them.
DJI drones save Waypoint routes. Fly at 2 PM. Save the mission. Come back at 7 PM. Load the mission. Same path. Same gimbal angle. Same speed. The edit looks like time travel.
AI-Assisted Replays
The Olympics used AI to generate volumetric replays. Multiple camera angles stitched into 3D space. The viewer can orbit the action.
Consumer version: Luma AI and similar tools can now turn your drone footage into 3D fly-arounds. Upload 20 seconds of orbiting footage. The AI fills in the gaps. Not perfect yet, but getting scary good.
Handheld + Aerial Hybrid Editing
The SkyPixel 2026 winners showed something clear. The best videos mix drone shots with ground footage from Ronin gimbals and Osmo cameras. Pure drone shots feel disconnected. Cutting between aerial and ground-ground creates a story.
Night FPV: Camera Settings and Safety (The Real Stuff)
FPV at twilight is a different beast. You cannot see landmarks. Your video feed gets noisy. Here is how to survive.
FPV-Specific Camera Settings
| Setting | Night Value | Why |
|---|---|---|
| Shutter | Auto (minimum 1/60) | Slower shutter = more light, but more motion blur |
| Gain/ISO | Maximum auto gain | Noise is better than blindness |
| WDR | OFF | WDR ruins night footage |
| Saturation | Reduce slightly | LED glare looks fake at full saturation |
| Lens | Widest available (1.8mm or 2.1mm) | Wider lens gathers more light |
The OSD Setup That Saves Drones
Your On-Screen Display is your lifeline at night. You cannot see the drone. The OSD is all you have.
Essential OSD elements for night FPV:
-
Battery voltage (critical — you cannot spot a dead battery landing)
-
Home arrow and distance to home
-
Altitude (above ground level)
-
GPS satellite count + fix status
Run DVR every single night flight. If you lose the quad, the recorded footage is your only map back to it.
GPS Rescue Mode: Not Optional
If your video feed cuts at night, you cannot visually navigate home. GPS Rescue Mode is mandatory. Set it up in Betaflight. Assign it to a switch. If the link drops, the quad flies itself back to home point.
Losing orientation is the #1 cause of night crashes. Use color-coded LEDs. White or blue at the front. Red at the rear. You can see the drone's heading from far away.
Equipment Recommendations for 2026
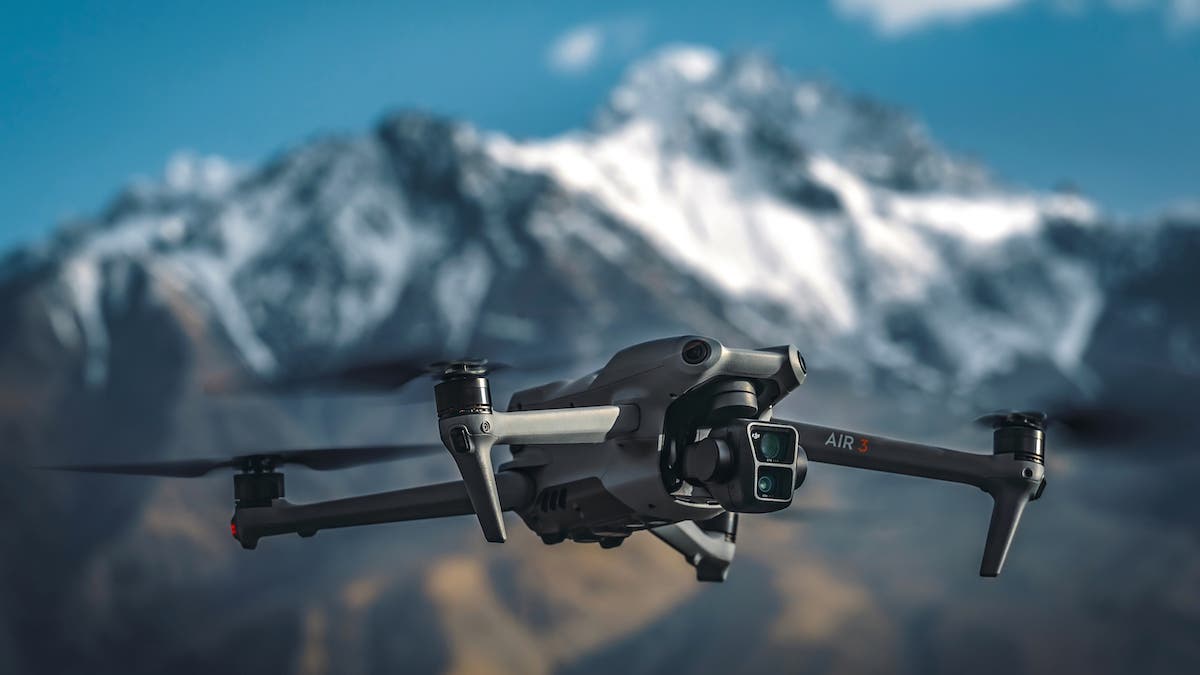
Best Drone for Twilight Cinematography (Consumer)
DJI Mavic 3 Pro
-
Variable aperture (f/2.8-f/11)
-
4/3 sensor (clean at ISO 1600)
-
Waypoint missions for day-to-night transitions
-
Price: $2,199
Why: The variable aperture is non-negotiable for twilight. Fixed aperture drones force you to use ND filters constantly. The Mavic 3 lets you stop down to f/5.6 in bright sunset, then open to f/2.8 at blue hour without landing.
Best FPV Drone for Twilight
DJI Avata 2
-
1/1.3-inch sensor
-
4K/60fps
-
Built-in prop guards (for flying near lights)
-
O4 video transmission (keeps feed clean at distance)
Why: The prop guards let you fly through tight spaces at night. The O4 transmission handles low-light interference better than analog.
Best Budget Option
DJI Mini 4 Pro
-
Same sensor as Mavic 3 (but fixed aperture)
-
4K/100fps HDR
-
Under 250g (fewer regulations)
-
Price: $759
The catch: Fixed aperture at f/1.7. It lets in tons of light (good) but you cannot stop down in bright sunsets (bad). You will need ND filters for early twilight.
ND Filter Kits
| Brand | Best For | Price |
|---|---|---|
| Freewell All-Day Kit | 6 filters (ND4 to ND64 + CPL) | $89 |
| PolarPro Cinema Series | Professional color neutrality | $129 |
| DJI Official ND Set | Perfect fit for Mavic/Air series | $79 |
Safety and Legal: What They Do Not Tell You?
DGCA Rules (India Example)
India updated night flying rules in 2024-2025. Here is the current situation :
-
Allowed: Night flying with proper lighting (anti-collision lights visible for 3 miles)
-
Not allowed: Flying above 120 meters (400 feet) at night without permission
-
Required: UIN for drones over 250g. Digital Sky permission for commercial flights.
-
Restricted zones: Airports, military areas, and "red zones" in major cities (check the DGCA No Fly Zone app)
Check your local regulations. Many countries restrict night flying to licensed operators.
Practical Night Safety
Never fly at night without:
-
Fully charged batteries (start at 100%, land at 30%)
-
A visible strobe light on the drone (Firehouse Technology Arc V is a good choice)
-
A spotter (second pair of eyes)
-
GPS lock before takeoff (minimum 12 satellites)
-
Home point confirmed on your map
Never fly at night with:
-
Wind over 20 km/h (you cannot judge drift visually)
-
Fog or low clouds (moisture kills electronics and blocks VLOS)
-
An untested drone (fly it at noon first)
Who Twilight Cinematography Is For (And Not For)?
Twilight cinematography is for you if:
-
You want footage that stands out from daytime pilots
-
You shoot real estate or city skylines
-
You have patience for planning (light changes fast)
-
You understand basic camera exposure (ISO/shutter/aperture)
Twilight cinematography is NOT for you if:
-
You just bought your first drone (learn at noon first)
-
You cannot fly in GPS mode consistently
-
You hate editing (twilight shots need color grading)
-
You are on a tight battery budget (you will get 2-3 flights per evening max)
Day-to-Night Transition: Step-by-Step Tutorial
This is the trend everyone wants to learn.
Step 1: Scout your location at noon. Find a landmark that looks good in both day and night. Bridges work great. Skylines work great.
Step 2: Create a Waypoint mission. In DJI Fly or DJI Pilot, set 5-10 waypoints. Record the gimbal angle at each point. Speed: 2-3 m/s (slow).
Step 3: Fly the mission at golden hour (1 hour before sunset). Land. Save the footage.
Step 4: Wait 2 hours. The sun is gone. City lights are on.
Step 5: Load the same Waypoint mission. Fly it again. Same speed. Same gimbal.
Step 6: Edit. In Premiere Pro or DaVinci Resolve, stack the two clips. Align them using a static object (a building corner works best). Add a 2-second cross-dissolve halfway through.
Step 7: Export. Watch the magic happen.
The Final Thoughts
Twilight Drone Cinematography is not harder than daytime flying. It is just different. You trade visibility for drama. Start simple. One twilight flight per week. Use the settings in this guide.
Review your footage the next morning. Fix one thing each time. The 2026 trends are clear. FPV is mainstream. Day-to-night transitions are viral. Starburst mode is real. And the Olympics just proved that twilight aerial shots can be the most memorable moments of any production.
Open your aperture. Lower your ISO. Turn off WDR. And for the love of your drone, enable GPS Rescue before you take off.
The blue hour waits for no one.